I write a column for the SCBWI Bulletin with tips on self-publishing children’s books. The winter Bulletin includes my column on interior
design for print books. Because I did not have enough space to include
instructions for formatting using Microsoft Word, I’m including some detail
here. Although, after writing all this, I found some other online sources that
are even better. So you may want to skim over my instructions, and then click
on the first couple of links below. See which one looks like the best fit for
your learning style.
Microsoft Word is an adequate tool for doing the interior
layout for novels with no or minimal interior images. (Professional designers
generally prefer Adobe InDesign, but it’s very expensive. You probably already
have Word.) The process is not necessarily easy or intuitive, so schedule some
time, and take a break if you’re getting frustrated. You may also want to take
notes on any tweaks you need to make for your preferences or your system. That
way you’ll have those instructions for the next book you format.
I’m currently using Windows 10, but these instructions
should work for most recent versions of Word.
Basic Setup
First of all, save a new version of your manuscript to
format for print, because you will not want all these things in the version you
use for the e-book.
Start by setting up your page size (equal to the book’s trim
size) and your margins:
Under the “Page Layout” tab, click on Size and then choose
the size you want your print book to be. Five or 5 1/2 inches wide is good for
a children’s novel and no more than eight inches high.
 |
Mirror margins mean I can put page numbers at the outsides
and different headings (name on left, title on right) |
Next click on Margins– Custom Margins – Multiple Pages –
Mirror Margins. Your interior margin must be at least .375” for books up to 150
pages, and .75” for books with 151 to 400 pages. Other margins must be at least
.25 inches but you may want them larger for aesthetics. Measure the margins in
some published books you like to see the difference it can make. Larger margins
will also mean a bigger page count. That could be good if you have a short book
and want to make it a bit thicker, but if you have a long book, more pages
could mean you need to charge a higher price for it.
You may also have to adjust your header and footer distances
to get the margins you want.
 |
In Word, it looks like my title page is on the left
of a two-page spread |
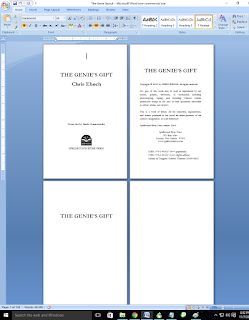
Front Matter
Front matter – that’s the stuff before the main text, the title
page, copyright page, dedication, etc. – may be center justified. Choose a nice
(stylish but readable) font and adjust the size appropriately You probably want
a fairly large title, for example. Again, choose some traditionally published
books and copy the type of content they have as well as the formatting.
The first page of novel text should be on the right-hand
side, with a blank page opposite. If you view two pages at a time, remember
that they won’t be the same two-page spreads that show up in the printed book.
Rather, your first page will be a left-hand page when viewed in Microsoft Word,
but a right-hand page in the print book.
Odd-numbered pages should always be on the right.
Headings
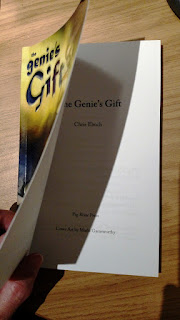 |
The title page is actually a right-hand page
because the first printed page faces up |
Some books have the author name, the book title, and/or the
chapter title at the tops of the pages. You’ll see it both ways in
traditionally published books though, and setting this up is a bit complicated,
so you might want to skip it. If you do want to use these headings, the first
page of each chapter should not have
a heading. Also, front matter and back matter (author’s note or whatever you
have the back after the main text) should not have a heading. If you’re using
headings, use section breaks (not page breaks) between chapters. This allows
you to set up a different first page header (a blank header) for each chapter.
To put in a heading, double-click at the top of the page,
above the main text, and Word should switch to into viewing the Header and
Footer. You can then type in those spaces and format (left, right, center;
change the font and the font size; etc.) Make sure to click the box that says
Different First Page, and do not type anything in the first page. Also click
Different Odd & Even Pages so you can put the book title on one side and
the author name or chapter titles on the other side.
If you Link to Previous, each chapter will have the same
headers and footers as the previous chapter. For front matter and back matter,
un-click Link to Previous and erase anything in the headers and footers.
If your header or footer seem too large, make sure you don’t
have an extra blank line above or below any text.
Text Design
For the main text, use full justification as opposed to ragged
right. (This is under the Paragraph tab.) This will spread the text between the
margins on the left and right. However, you may wind up with large gaps between
some words. You will need to look for these gaps in your final review (below).
Choose your font and size. Garamond is a nice font for a
novel. You can get fancy, but don’t get too fancy – use a readable font. It’s
simplest if you use one you already have included with Microsoft Word, so you
don’t have to worry about buying or licensing a specialty font or making sure
it’s properly embedded in the PDF.
Adjust the leading (space between lines) by selecting all
the relevant text, going to the Home Tab – Paragraph – Line Spacing and
choosing Exactly and then the leading you want. 12.4 and 13.3 are common for
leading, but you may want more or less depending on the font and font size.
Make sure you’re not cutting off hanging letters from the line above – double
check in the PDF, as it may be different from the Word version.
If that sounds too complicated, you can simply single space –
but do not ever double space for a novel! (Yes, I’ve seen that in a self-published
book.)
You may want to decrease your tab or first-line indent size
so paragraphs aren’t indented as much. If you haven’t been able to break the
habit of using five periods to indent, use the Search – Replace function and
get rid of those.
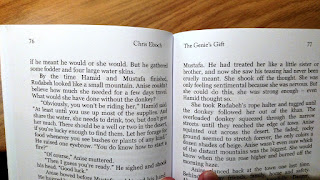
Chapters
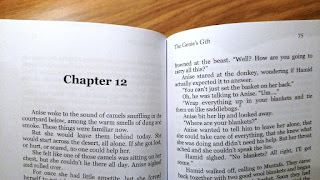 |
| No headings on the first page of the chapter! |
Add your chapter headings (whether this is just Chapter One or a chapter title). You can
center the chapter headings and adjust the size. You may want the first word or
letter of a chapter to be larger or bold. Study other books for ideas.
Of course you want all your chapter headings to be the same
throughout. I found the simplest way to do this is to use the Format Painter
button – the little paintbrush in the upper left-hand corner. Double-click on
the paintbrush, and then scroll down to the next chapter heading. Click to the
left of it and the line should adjust to the same formatting. Scroll down farther
and repeat.
Final Polish
If you have any interior art, add it using the Insert
button. Microsoft Word apparently compresses art, so it won’t be as high
quality. This means it’s not ideal for books where the images are very
important, but you can use simple line art.
Scan through every page looking for large gaps between words,
and add hyphenation or otherwise adjust the formatting to get rid of them. Look
for widows
and orphans as well and get rid of them.
Save a copy as a PDF -- make sure you have chosen “standard”
format. Choose ISO option if it’s not embedding the fonts. Double-check that
all your formatting came through, such as italics. Be sure all your formatting
is consistent.
Now you are ready to upload your document!
Troubleshooting
If my tips don’t seem to be working, or you need to know
something else, do an Internet search for what you want to do and you should
come up with plenty of tutorials, both written and video. They are often better
than the Help menu in Word. You might also be able to find a tutorial that
simply walks you through lots of the options.
One incredibly valuable tool is the Replace option. You’ll
find it in the upper right corner of the Home tab. It can be used to fix all
those problems that come from old habits. For example, search for two spaces
and replace with one space. Click on the “More” button and then “special” to
see many more options. If you have a document with tabs and you want to use the
indent formatting instead, you can Replace “tab” (there are symbols that
indicate these things; you don’t actually use the word) with nothing.
I always use the Replace function and replace " with
" – the symbols look the same, but it will ensure that all quotes are “smart”
or “curly” rather than straight. I do the same with the apostrophe.
And don’t forget the Undo button in case you do something
wrong! If things are going well but you want to experiment with something
risky, it might be a good idea to save the document in a new version before you
start playing with it.
If you are overwhelmed, you have other options, such as
hiring a professional or using a template. Print on demand companies may supply
a template. You can buy more advanced preformatted templates available for
Microsoft Word and Adobe InDesign. TheBookDesigner
has some for children’s books starting at $37.
Chris Eboch is the author of 40+ traditionally-published books and 10 self-published titles,
including You Can Write for Children: How to Write Great Stories, Articles,
and Books for Kids and Teenagers and Advanced
Plotting. Visit her Amazon page or website.
Additional resources:


